# doccano
[](https://travis-ci.org/chakki-works/doccano)
doccano is an open source text annotation tool for human. It provides annotation features for text classification, sequence labeling and sequence to sequence. So, you can create labeled data for sentiment analysis, named entity recognition, text summarization and so on. Just create project, upload data and start annotation. You can build dataset in hours.
## Demo
You can enjoy [annotation demo](http://doccano.herokuapp.com).
### [Named entity recognition](https://doccano.herokuapp.com/demo/named-entity-recognition/)
First demo is one of the sequence labeling tasks, named-entity recognition. You just select text spans and annotate it. Since doccano supports shortcut key, so you can quickly annotate text spans.
### [Sentiment analysis](https://doccano.herokuapp.com/demo/text-classification/)
Second demo is one of the text classification tasks, topic classification. Since there may be more than one category, you can annotate multi-labels.

### [Machine translation](https://doccano.herokuapp.com/demo/translation/)
Final demo is one of the sequence to sequence tasks, machine translation. Since there may be more than one responses in sequence to sequence tasks, you can create multi responses.
## Deployment
### Azure
Doccano can be deployed to Azure ([Web App for Containers](https://azure.microsoft.com/en-us/services/app-service/containers/) +
[PostgreSQL database](https://azure.microsoft.com/en-us/services/postgresql/)) by clicking on the button below:
[](https://portal.azure.com/#create/Microsoft.Template/uri/https%3A%2F%2Fraw.githubusercontent.com%2Fchakki-works%2Fdoccano%2Fmaster%2Fazuredeploy.json)
### Heroku
Doccano can be deployed to [Heroku](https://www.heroku.com/) by clicking on the button below:
[](https://heroku.com/deploy)
Of course, you can deploy doccano by using [heroku-cli](https://devcenter.heroku.com/articles/heroku-cli).
```bash
heroku create
heroku stack:set container
git push heroku master
```
### AWS
Doccano can be deployed to AWS ([Cloudformation](https://docs.aws.amazon.com/AWSCloudFormation/latest/UserGuide/Welcome.html)) by clicking on the button below:
[](https://us-east-1.console.aws.amazon.com/cloudformation/home?region=us-east-1#/stacks/create/review?templateURL=https://s3-external-1.amazonaws.com/cf-templates-10vry9l3mp71r-us-east-1/20190732wl-new.templatexloywxxyimi&stackName=doccano)
> Notice: (1) EC2 KeyPair cannot be created automatically, so make sure you have an existing EC2 KeyPair in one region. Or [create one yourself](https://docs.aws.amazon.com/AWSEC2/latest/UserGuide/ec2-key-pairs.html#having-ec2-create-your-key-pair). (2) If you want to access doccano via HTTPS in AWS, here is an [instruction](https://github.com/chakki-works/doccano/wiki/HTTPS-setting-for-doccano-in-AWS).
## Features
* Collaborative annotation
* Multi-Language support
* Emoji :smile: support
* (future) Auto labeling
## Requirements
* Python 3.6+
* Django 2.1.7+
* Node.js 8.0+
* Google Chrome(highly recommended)
## Installation
First of all, you have to clone the repository:
```bash
git clone https://github.com/chakki-works/doccano.git
cd doccano
```
To install doccano, there are three options:
**Option1: Pull the production Docker image**
```bash
docker pull chakkiworks/doccano
```
**Option2: Setup Python environment**
First we need to install the dependencies. Run the following commands:
```bash
pip install -r requirements.txt
cd app
```
Next we need to start the webpack server so that the frontend gets compiled continuously.
Run the following commands in a new shell:
```bash
cd server
npm install
npm run build
# npm start # for developers
```
**Option3: Pull the development Docker-Compose images**
```bash
docker-compose pull
```
## Usage
### Start the development server
Let’s start the development server and explore it.
Depending on your installation method, there are two options:
**Option1: Running the Docker image as a Container**
First, run a Docker container:
```bash
docker run -d --name doccano -p 8000:80 chakkiworks/doccano
```
Then, execute `create-admin.sh` script for creating a superuser.
```bash
docker exec doccano tools/create-admin.sh "admin" "admin@example.com" "password"
```
**Option2: Running Django development server**
Before running, we need to make migration. Run the following command:
```bash
python manage.py migrate
```
Next we need to create a user who can login to the admin site. Run the following command:
```bash
python manage.py create_admin --noinput --username "admin" --email "admin@example.com" --password "password"
```
Finally, to start the server, run the following command:
```bash
python manage.py runserver
```
**Option3: Running the development Docker-Compose stack**
We can use docker-compose to set up the webpack server, django server, database, etc. all in one command:
```bash
docker-compose up
```
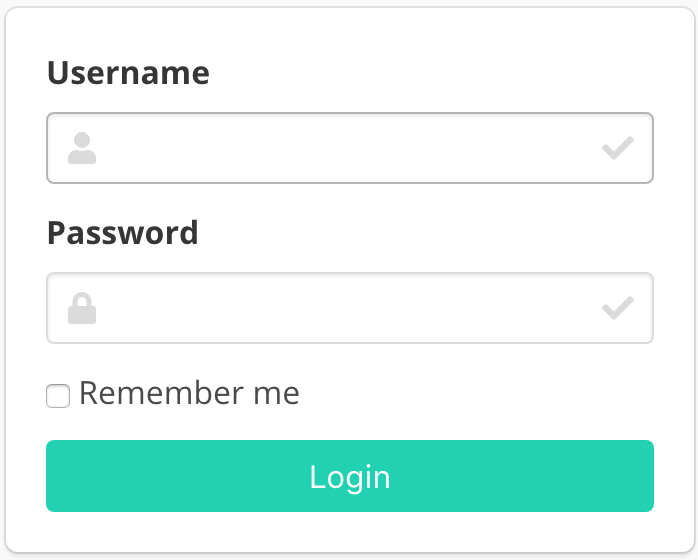
Now, open a Web browser and go to . You should see the login screen:
 ### Create a project
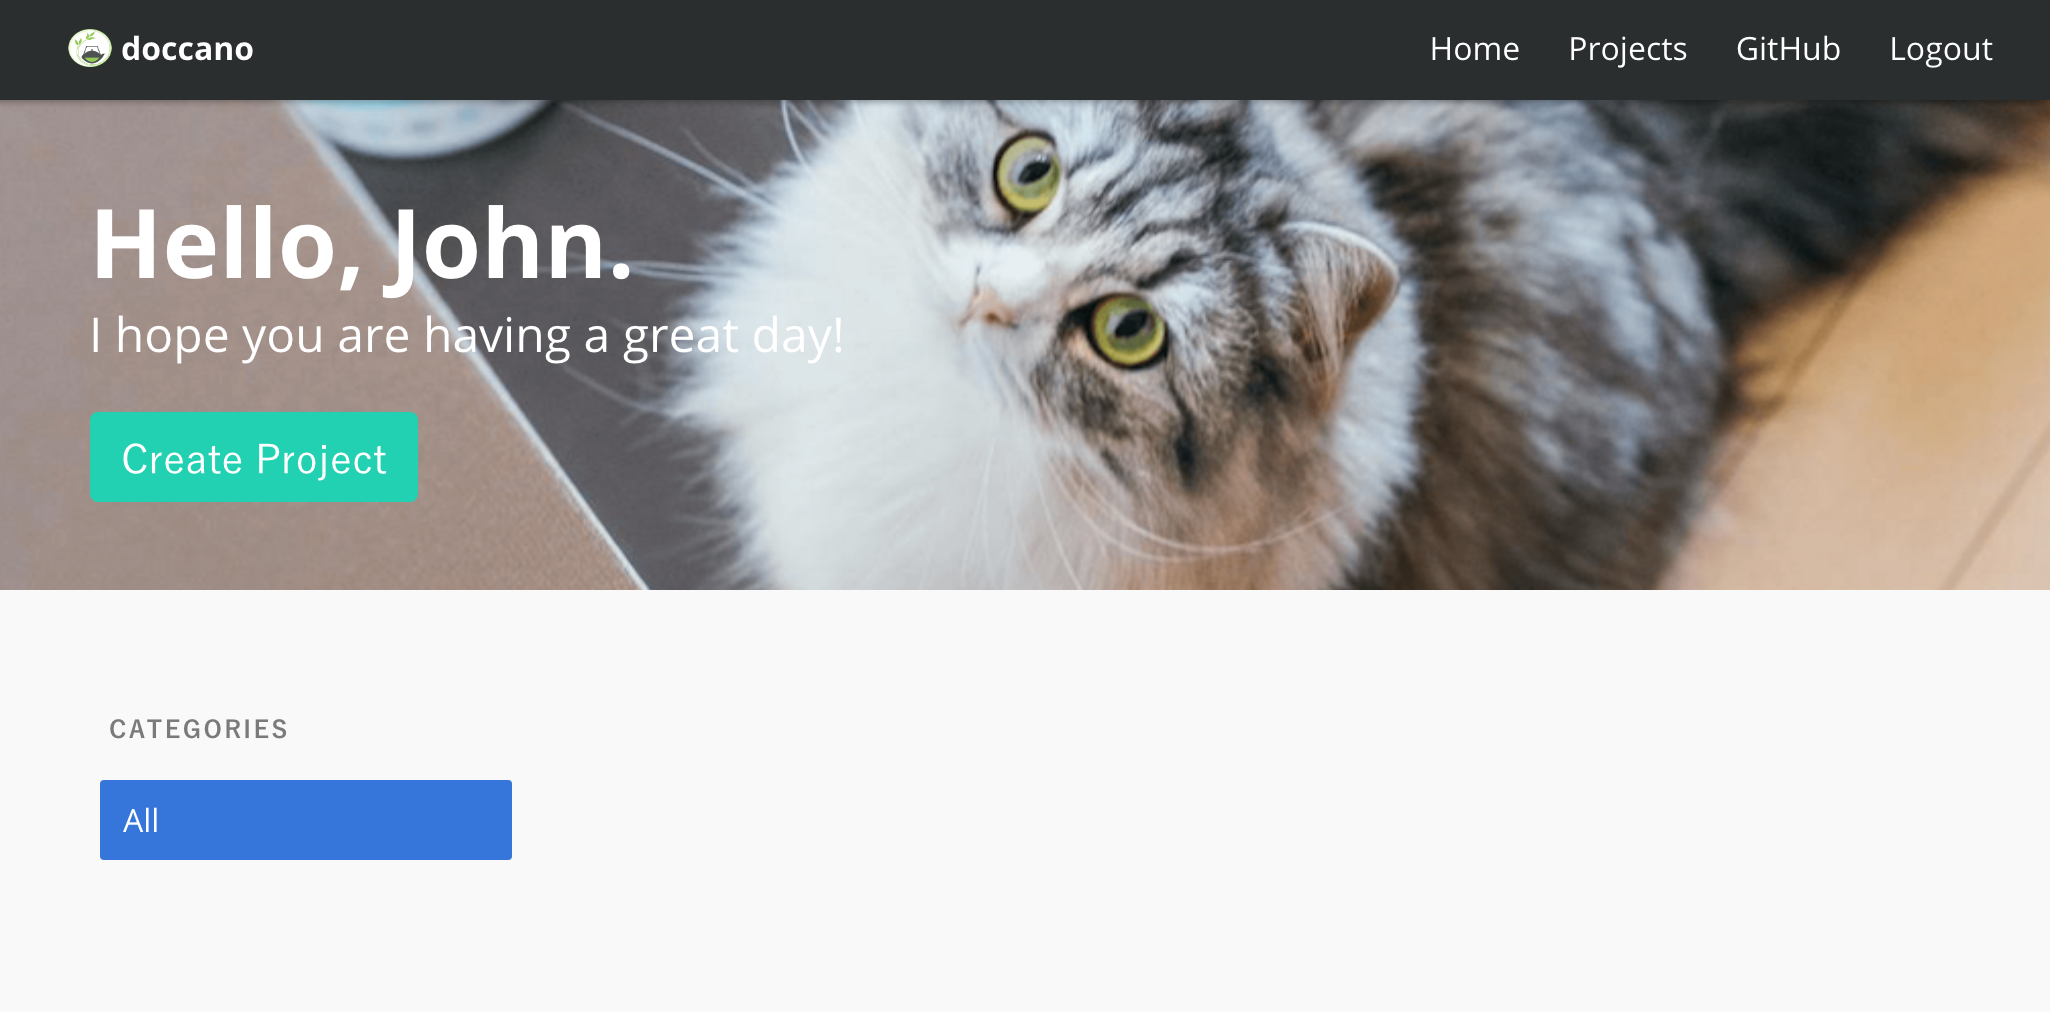
Now, try logging in with the superuser account you created in the previous step. You should see the doccano project list page:
### Create a project
Now, try logging in with the superuser account you created in the previous step. You should see the doccano project list page:
 There is no project created yet. To create your project, make sure you’re in the project list page and select `Create Project` button. You should see the following screen:
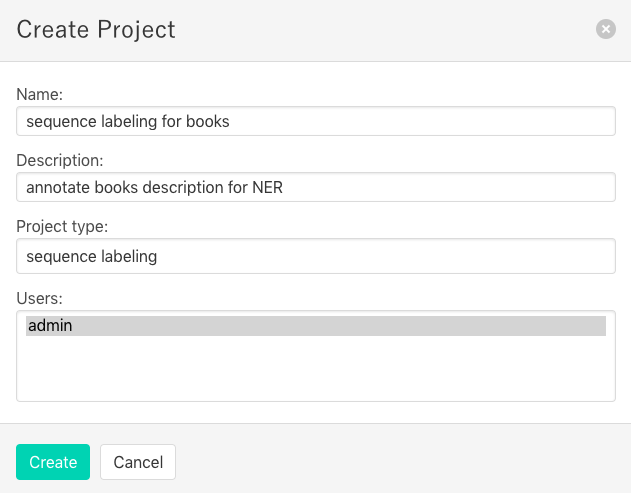 In this step, you can select three project types: text classificatioin, sequence labeling and sequence to sequence. You should select a type with your purpose.
### Import Data
After creating a project, you will see the "Import Data" page, or click `Import Data` button in the navigation bar. You should see the following screen:
In this step, you can select three project types: text classificatioin, sequence labeling and sequence to sequence. You should select a type with your purpose.
### Import Data
After creating a project, you will see the "Import Data" page, or click `Import Data` button in the navigation bar. You should see the following screen:
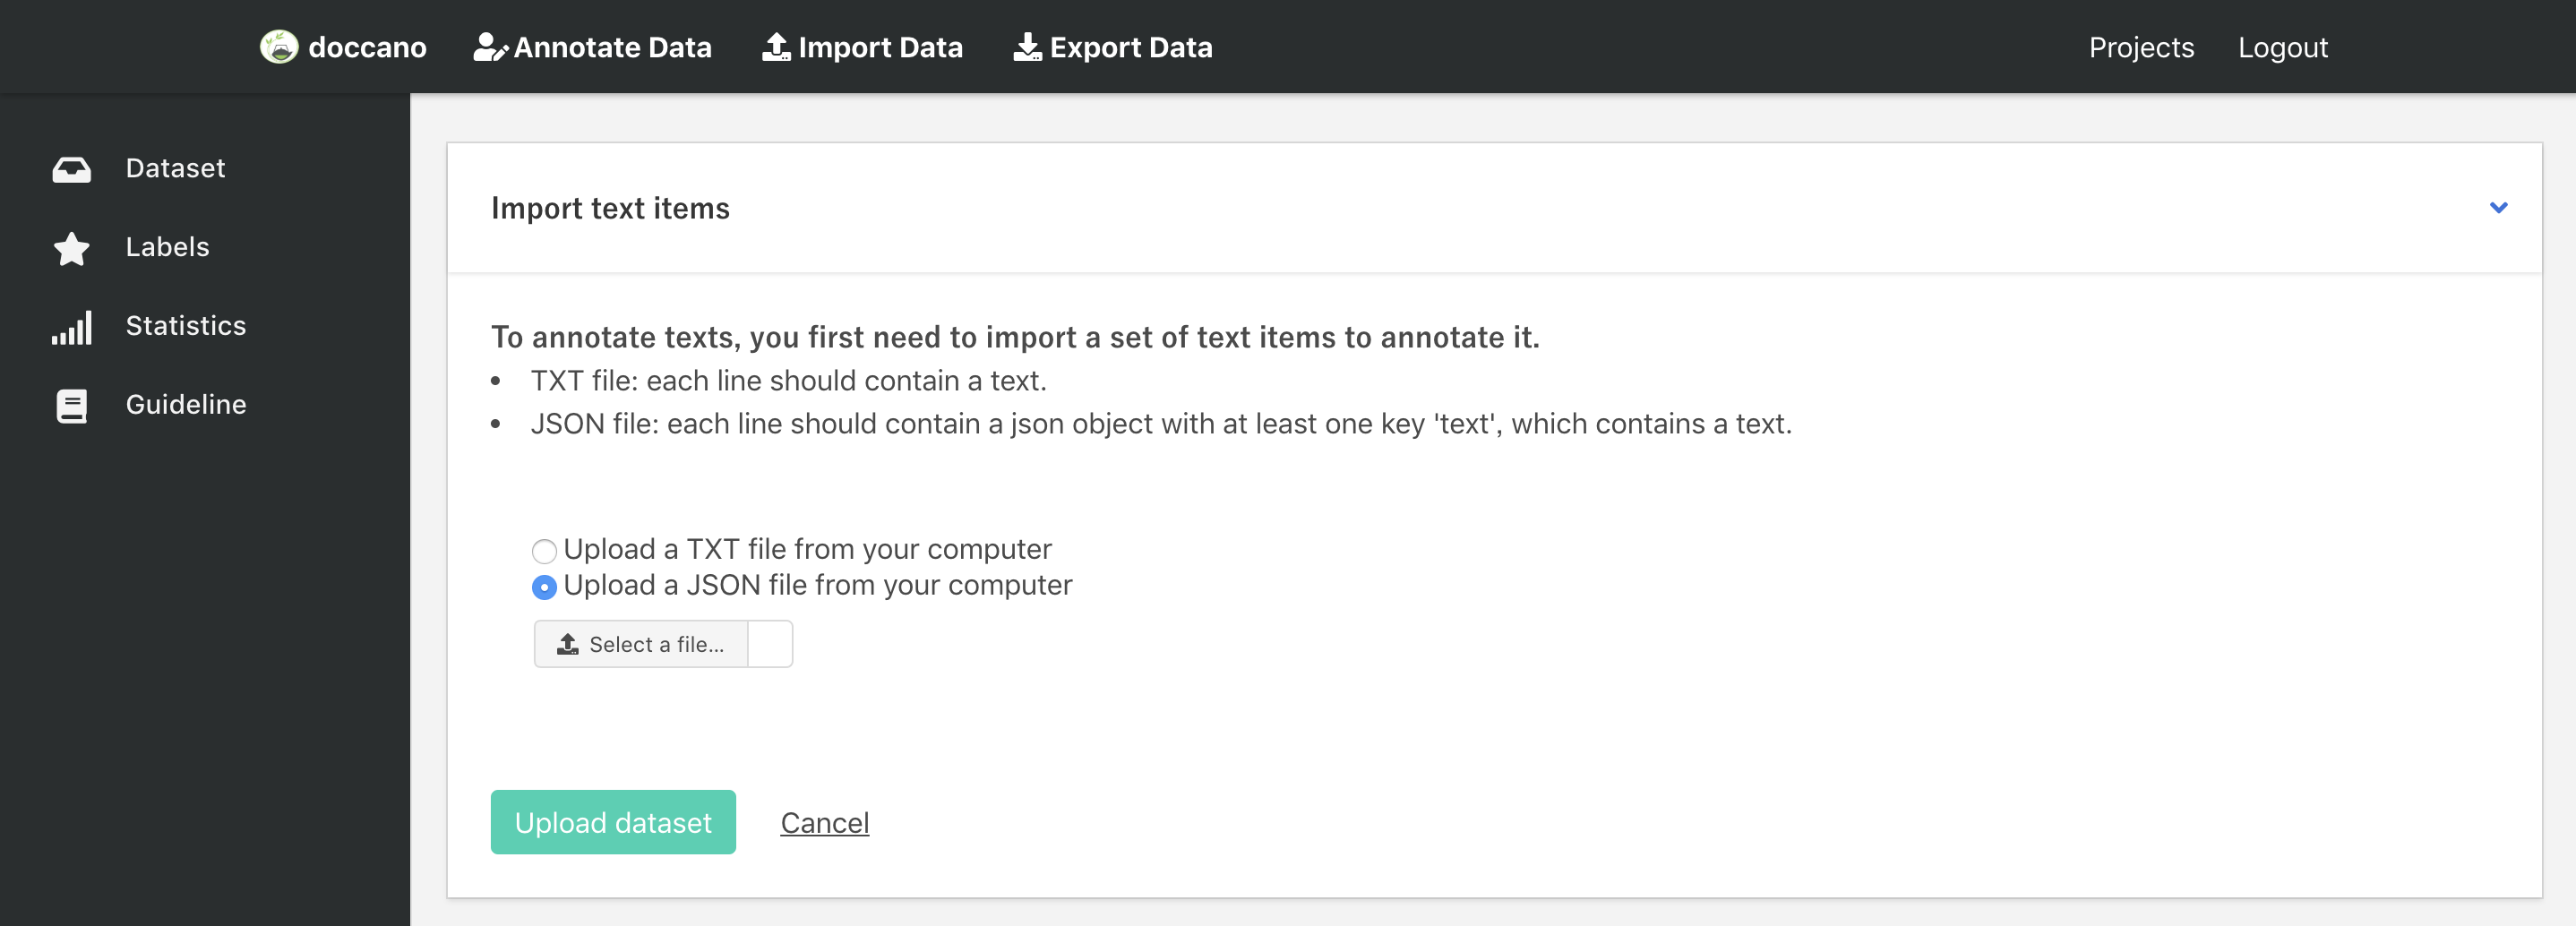 You can upload two types of files:
- `CSV file`: file must contain a header with a `text` column or be one-column csv file.
- `JSON file`: each line contains a JSON object with a `text` key. JSON format supports line breaks rendering.
> Notice: Doccano won't render line breaks in annotation page for sequence labeling task due to the indent problem, but the exported JSON file still contains line breaks.
`example.txt` (or `example.csv`)
```python
EU rejects German call to boycott British lamb.
President Obama is speaking at the White House.
He lives in Newark, Ohio.
...
```
`example.json`
```JSON
{"text": "EU rejects German call to boycott British lamb."}
{"text": "President Obama is speaking at the White House."}
{"text": "He lives in Newark, Ohio."}
...
```
Any other columns (for csv) or keys (for json) are preserved and will be exported in the `metadata` column or key as is.
Once you select a TXT/JSON file on your computer, click `Upload dataset` button. After uploading the dataset file, we will see the `Dataset` page (or click `Dataset` button list in the left bar). This page displays all the documents we uploaded in one project.
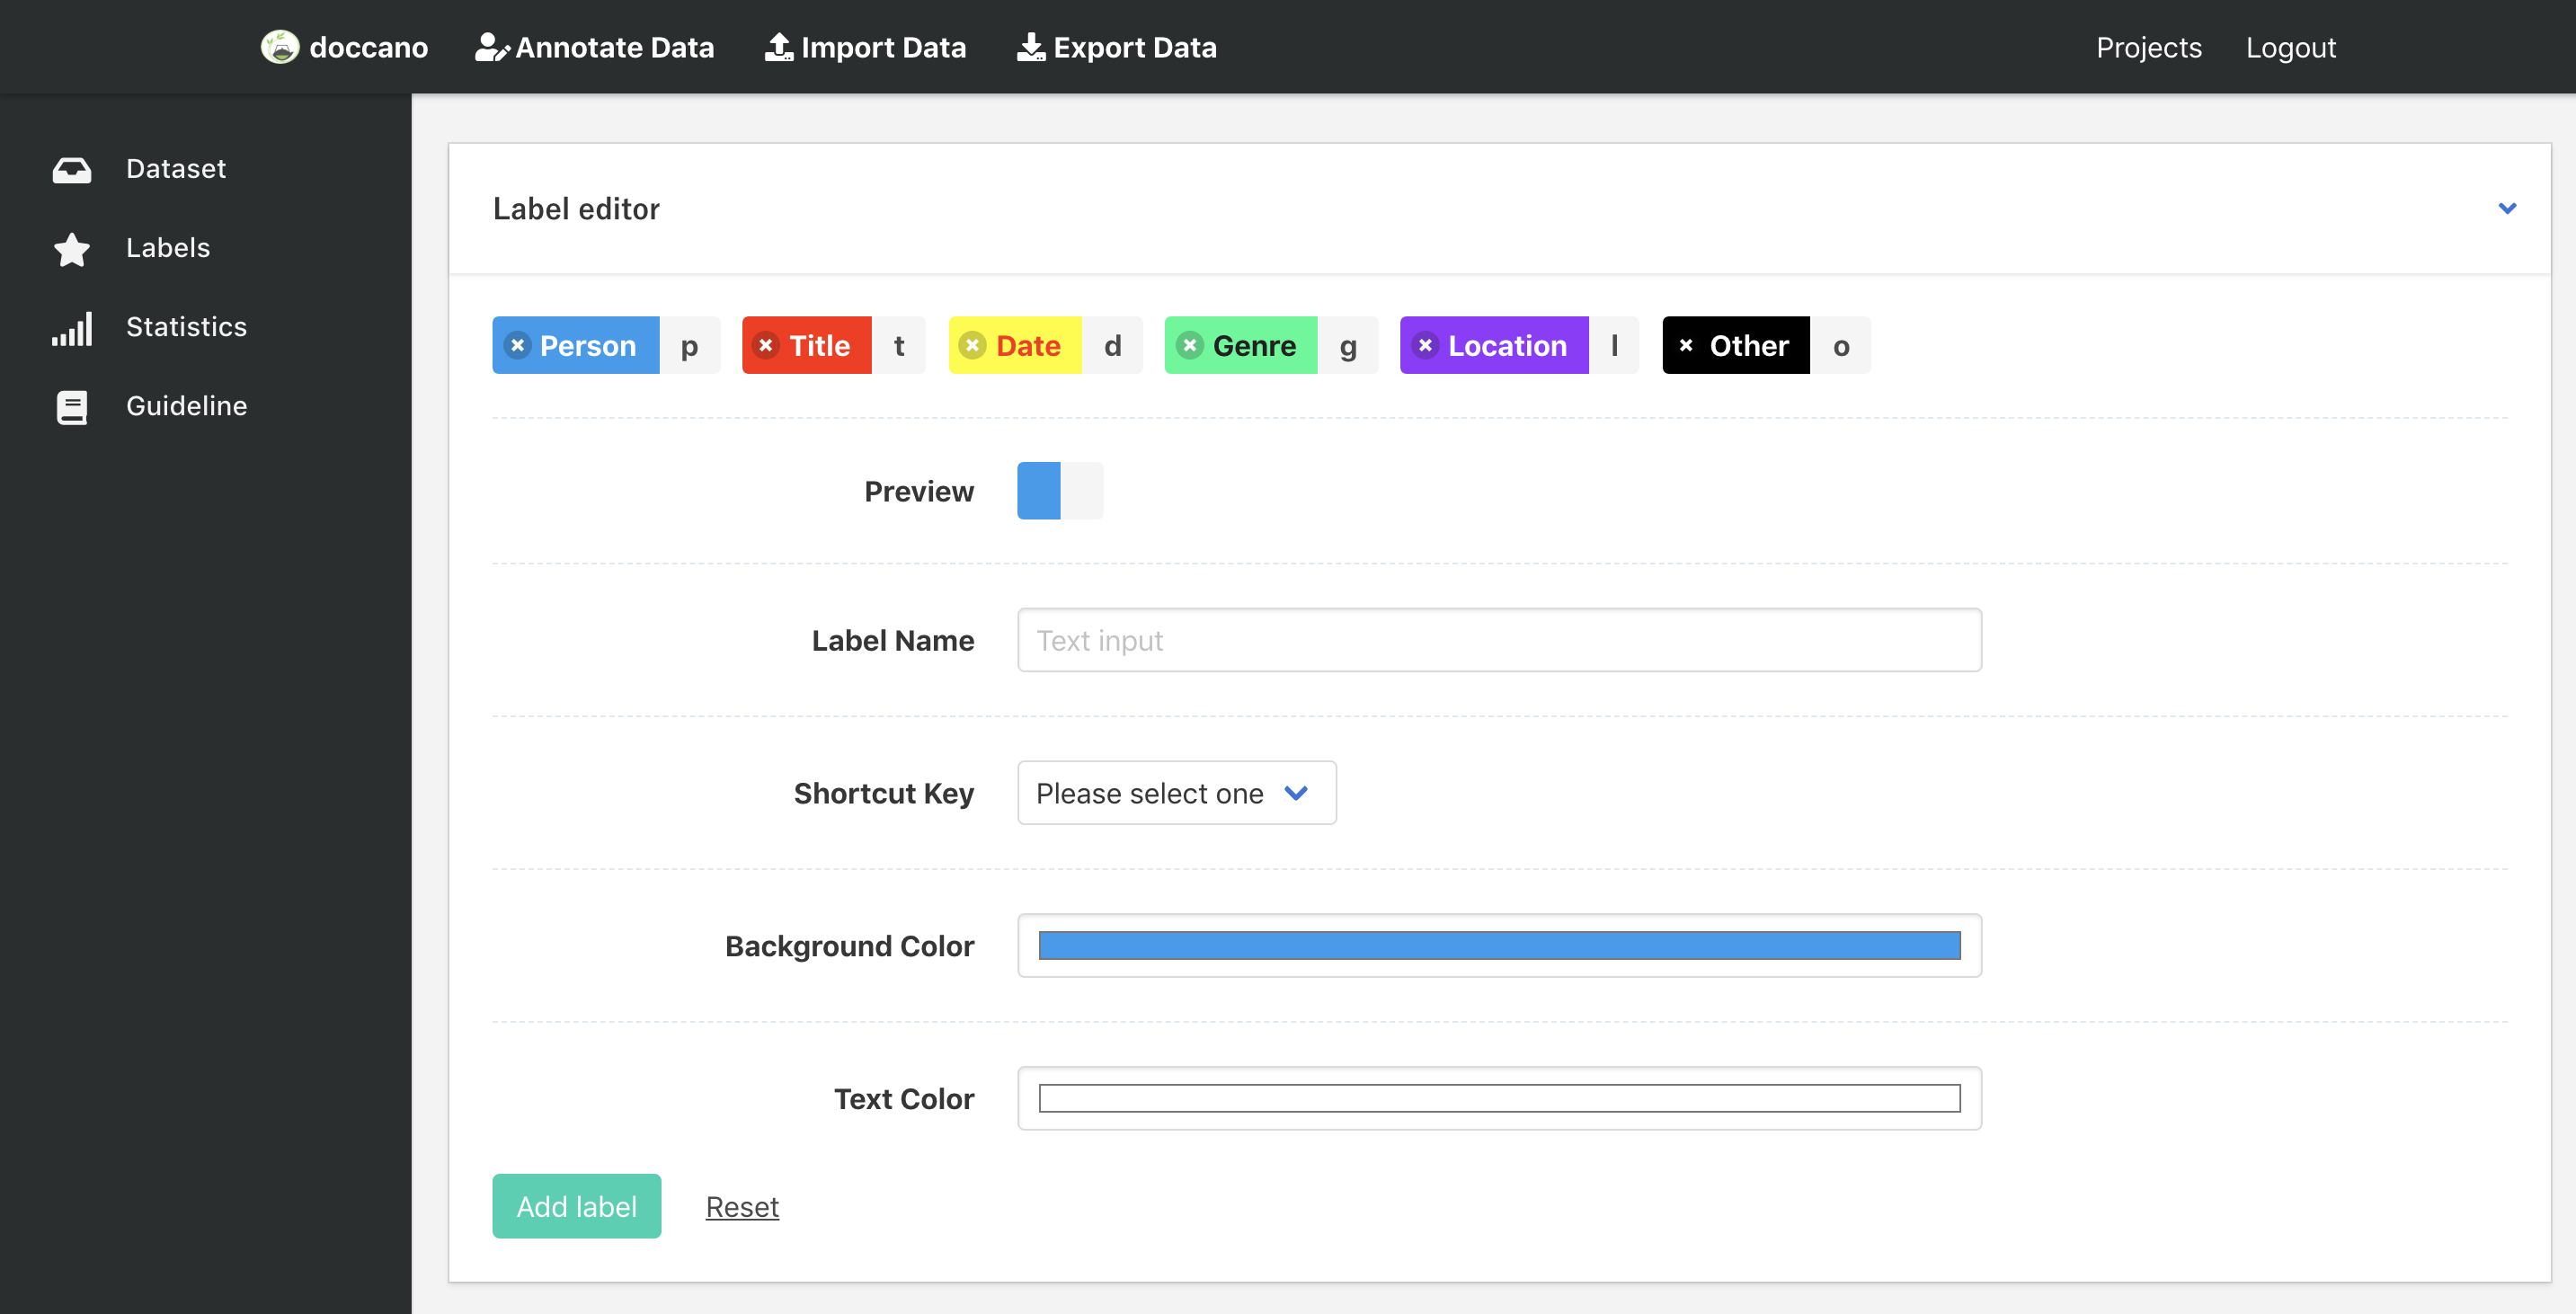
### Define labels
Click `Labels` button in left bar to define your own labels. You should see the label editor page. In label editor page, you can create labels by specifying label text, shortcut key, background color and text color.
You can upload two types of files:
- `CSV file`: file must contain a header with a `text` column or be one-column csv file.
- `JSON file`: each line contains a JSON object with a `text` key. JSON format supports line breaks rendering.
> Notice: Doccano won't render line breaks in annotation page for sequence labeling task due to the indent problem, but the exported JSON file still contains line breaks.
`example.txt` (or `example.csv`)
```python
EU rejects German call to boycott British lamb.
President Obama is speaking at the White House.
He lives in Newark, Ohio.
...
```
`example.json`
```JSON
{"text": "EU rejects German call to boycott British lamb."}
{"text": "President Obama is speaking at the White House."}
{"text": "He lives in Newark, Ohio."}
...
```
Any other columns (for csv) or keys (for json) are preserved and will be exported in the `metadata` column or key as is.
Once you select a TXT/JSON file on your computer, click `Upload dataset` button. After uploading the dataset file, we will see the `Dataset` page (or click `Dataset` button list in the left bar). This page displays all the documents we uploaded in one project.
### Define labels
Click `Labels` button in left bar to define your own labels. You should see the label editor page. In label editor page, you can create labels by specifying label text, shortcut key, background color and text color.
 ### Annotation
Now, you are ready to annotate the texts. Just click the `Annotate Data` button in the navigation bar, you can start to annotate the documents you uploaded.
### Annotation
Now, you are ready to annotate the texts. Just click the `Annotate Data` button in the navigation bar, you can start to annotate the documents you uploaded.
 ### Export Data
After the annotation step, you can download the annotated data. Click the `Edit data` button in navigation bar, and then click `Export Data`. You should see below screen:
### Export Data
After the annotation step, you can download the annotated data. Click the `Edit data` button in navigation bar, and then click `Export Data`. You should see below screen:
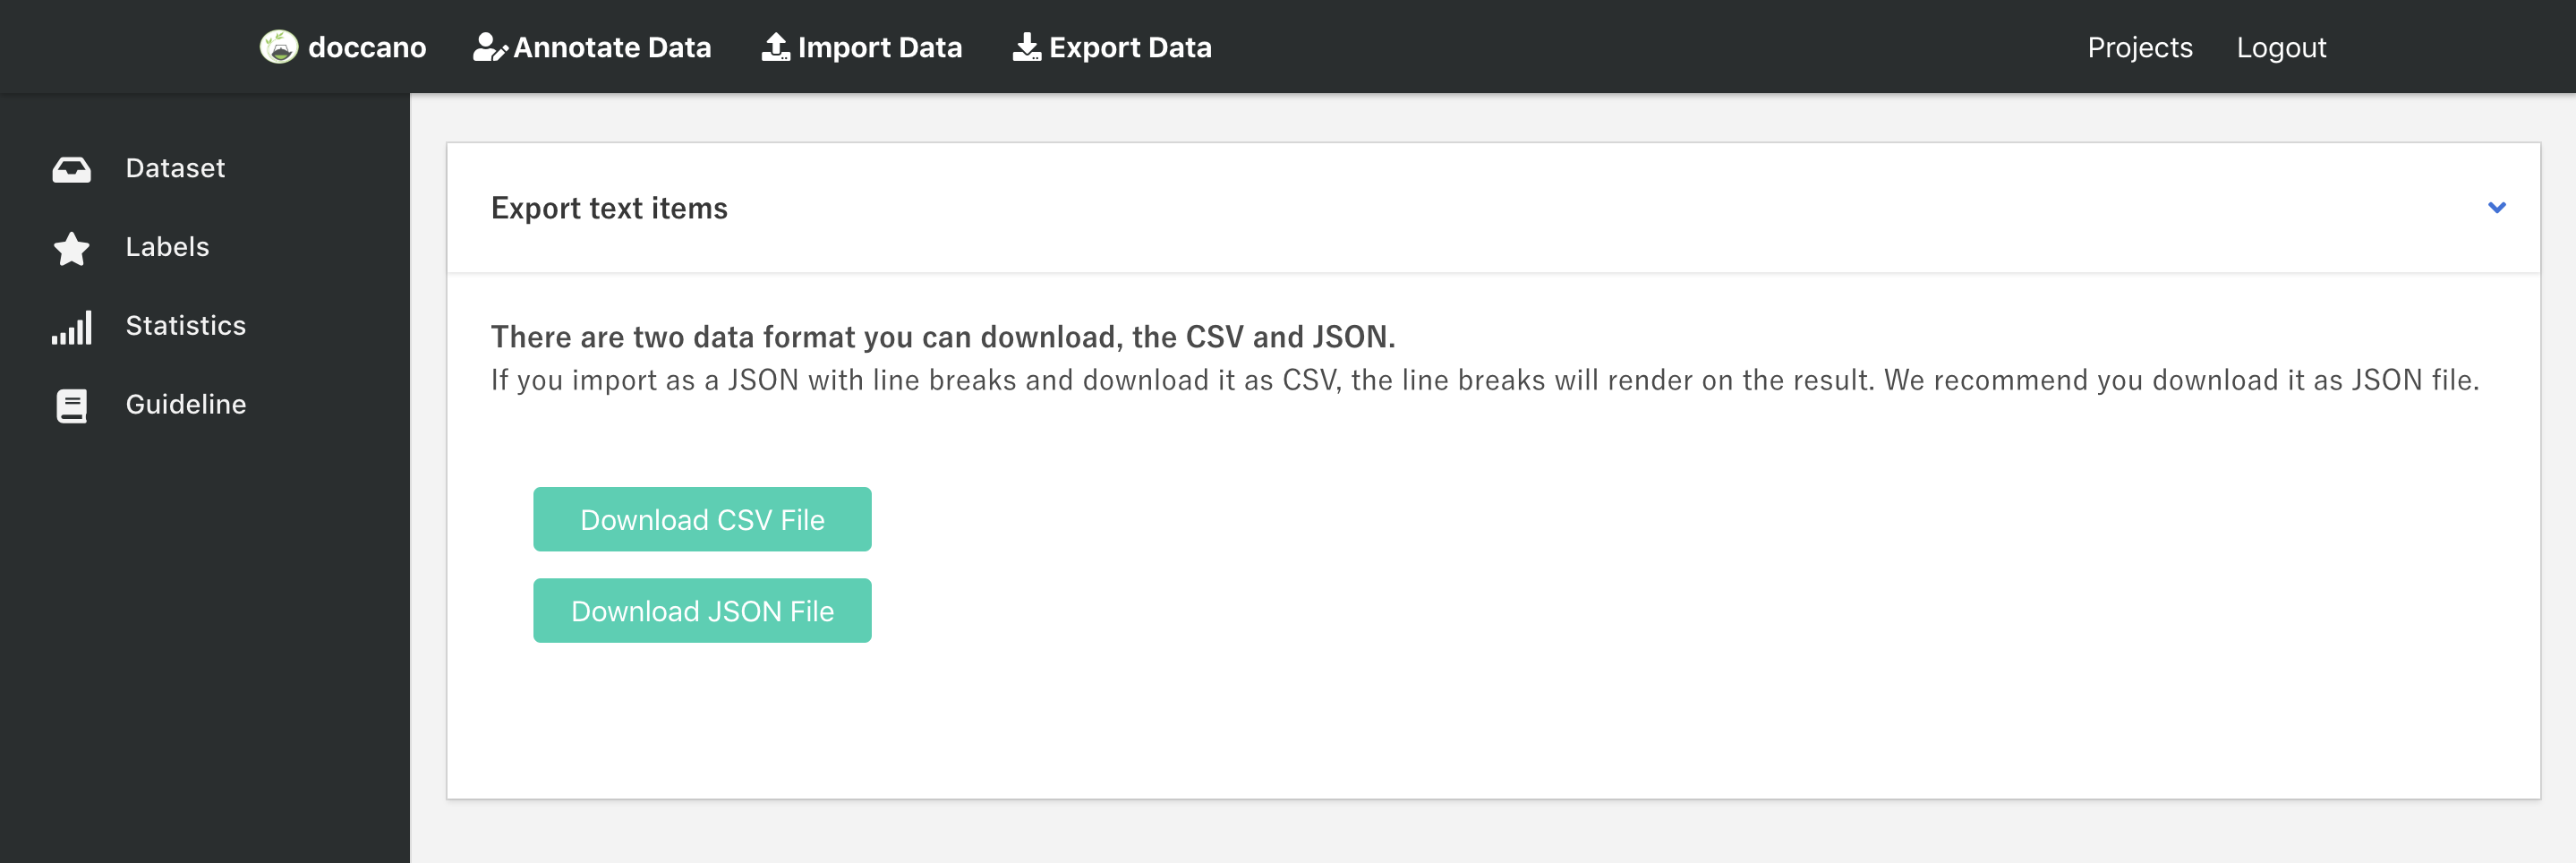 You can export data as CSV file or JSON file by clicking the button. As for the export file format, you can check it here: [Export File Formats](https://github.com/chakki-works/doccano/wiki/Export-File-Formats).
Each exported document will have metadata column or key, which will contain
additional columns or keys from the imported document. The primary use-case for metadata is to allow you to match exported data with other system
by adding `external_id` to the imported file. For example:
Input file may look like this:
`import.json`
```JSON
{"text": "EU rejects German call to boycott British lamb.", "external_id": 1}
```
and the exported file will look like this:
`output.json`
```JSON
{"doc_id": 2023, "text": "EU rejects German call to boycott British lamb.", "labels": ["news"], "username": "root", "metadata": {"external_id": 1}}
```
### Tutorial
We prepared a NER annotation tutorial, which can help you have a better understanding of doccano. Please first read the README page, and then take the tutorial. [A Tutorial For Sequence Labeling Project](https://github.com/chakki-works/doccano/wiki/A-Tutorial-For-Sequence-Labeling-Project).
I hope you are having a great day!
## Contribution
As with any software, doccano is under continuous development. If you have requests for features, please file an issue describing your request. Also, if you want to see work towards a specific feature, feel free to contribute by working towards it. The standard procedure is to fork the repository, add a feature, fix a bug, then file a pull request that your changes are to be merged into the main repository and included in the next release.
Here are some tips might be helpful. [How to Contribute to Doccano Project](https://github.com/chakki-works/doccano/wiki/How-to-Contribute-to-Doccano-Project)
## Contact
For help and feedback, please feel free to contact [the author](https://github.com/Hironsan).
**If you are favorite to doccano, please follow my [GitHub](https://github.com/Hironsan) and [Twitter](https://twitter.com/Hironsan13) account.**
You can export data as CSV file or JSON file by clicking the button. As for the export file format, you can check it here: [Export File Formats](https://github.com/chakki-works/doccano/wiki/Export-File-Formats).
Each exported document will have metadata column or key, which will contain
additional columns or keys from the imported document. The primary use-case for metadata is to allow you to match exported data with other system
by adding `external_id` to the imported file. For example:
Input file may look like this:
`import.json`
```JSON
{"text": "EU rejects German call to boycott British lamb.", "external_id": 1}
```
and the exported file will look like this:
`output.json`
```JSON
{"doc_id": 2023, "text": "EU rejects German call to boycott British lamb.", "labels": ["news"], "username": "root", "metadata": {"external_id": 1}}
```
### Tutorial
We prepared a NER annotation tutorial, which can help you have a better understanding of doccano. Please first read the README page, and then take the tutorial. [A Tutorial For Sequence Labeling Project](https://github.com/chakki-works/doccano/wiki/A-Tutorial-For-Sequence-Labeling-Project).
I hope you are having a great day!
## Contribution
As with any software, doccano is under continuous development. If you have requests for features, please file an issue describing your request. Also, if you want to see work towards a specific feature, feel free to contribute by working towards it. The standard procedure is to fork the repository, add a feature, fix a bug, then file a pull request that your changes are to be merged into the main repository and included in the next release.
Here are some tips might be helpful. [How to Contribute to Doccano Project](https://github.com/chakki-works/doccano/wiki/How-to-Contribute-to-Doccano-Project)
## Contact
For help and feedback, please feel free to contact [the author](https://github.com/Hironsan).
**If you are favorite to doccano, please follow my [GitHub](https://github.com/Hironsan) and [Twitter](https://twitter.com/Hironsan13) account.**